Groups
The Group feature provides centralized user access control for the platform. Rather than managing permissions on a per-project basis, permissions are assigned to Groups. When a user is added to a Group, they automatically inherit all permissions defined by that Group. These permissions apply globally across all Team Projects that the user is associated with.
Why it matters / Use Cases:
- Centralized access control: Groups make it easy to assign consistent permissions to multiple users.
- Secure testing operations: They restrict who can view, edit, run, or deploy test cases.
- Controlled execution rights: Only authorized members can manage executions and runtime parameters.
- Organized project access: Groups control access to backlog, tasks, sprints, and documents.
- Filtered reporting access: They ensure that only selected users can view specific reports.
- Protected configuration settings: Groups prevent unauthorized changes to dashboards, views, or settings.
- Faster onboarding: New users automatically receive correct permissions when added to a group.
- Improved security compliance: Groups limit access to sensitive actions like admin-level options or deployment controls.
Prerequisites
- Access to ZeuZ Server with permissions for Admin → Group Policy → Groups.
- The user must be able to open the Policy Editor to create or modify groups.
- The user must have sufficient rights to create a new role, edit an existing role, or view available roles.
- Users should already exist in the system so they can be assigned to the group through the Assign Users option.
- Teams must know which actions (view or edit) each role in the group should have before configuring the toggles.
Quick-Start
- Open the Policy Editor: Navigate to the Policy Editor to view and manage permission policies.
- Select a Role: Choose a role from the list on the left, such as New group, Super Admin Group, or Default Group.
- Review Permissions: View the permissions assigned to the selected role under sections such as Testing, Create/Edit, and Search.
- Modify Permissions: Toggle the View or Edit options to adjust the permissions for each action.
- Save Changes: Click Save Changes to apply the updated permission settings.
- Assign Users: Use the Assign Users button to add or remove users from the selected role.
Features
Permission Resolution Logic
The Union Rule (Additive OR Logic)
Users can belong to multiple Groups simultaneously. The system uses an additive (OR logic) approach to resolve permissions when a user is a member of multiple groups.
Core Principle
If any single group grants a specific permission to a user, the user has that permission, even if their other groups do not have it.
Global Scope
Permissions are not project-specific. If a permission (e.g., "Deploy Test Case") is removed from a Group, that capability is revoked for all Team Projects associated with that Group's context.
Example Scenario: "Deploy Test Case"
User: John Doe
| Group Membership | Permission Status | Can Deploy? |
|---|---|---|
| Group A | OFF | ❌ No |
| Group B | OFF | ❌ No |
| Group C | ON | ✅ Yes |
Result: John Doe CAN Deploy Test Cases.
Important Note: A restriction in one group does not override a grant in another. To revoke access entirely, the user must be removed from all groups that grant that specific permission.
System Admin Group
The System Admin Group is the highest-privileged group in the ecosystem, equivalent to "Super Admin" level.
Membership
Contains all System Administrators.
Capabilities
- User Management: Can add other users to the System Admin Group.
- Full System Access: Has full access to all system features by default.
- Exclusive Privilege: Can view and edit the "Admin Menu Visibility" toggle for other groups.
Group Explanation
Policy Editor Section
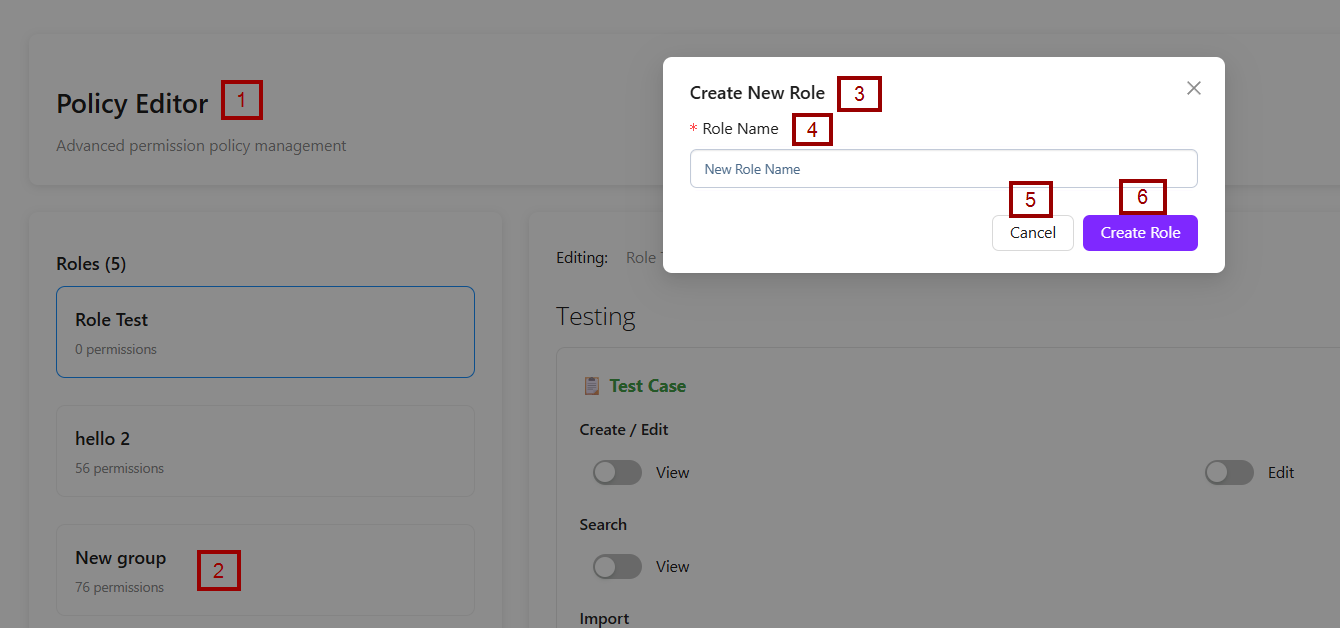
- On the left side, the Policy Editor panel lists existing roles. One example, "New Group", is visible with 76 permissions assigned.
- The Create Role + button is available on the right side of the Policy Editor.
- A modal window titled Create New Role is displayed at the center of the screen.
- The form includes a mandatory field labeled Role Name, where the user is expected to type the name of the new role.
- Two action buttons are provided:
- Cancel: Closes the popup without creating the role.
- Create Role: Confirms the creation of the new role once a valid name is entered.

Edit / Delete Roles
- The label Editing indicates that the user is working on the details or configuration of the selected role.
- The role's name, New group, is displayed beside the label for quick identification.
- Two action buttons appear on the right side:
- Edit: Allows the user to modify the role's name or settings.
- Delete: It is highlighted in red to signal a critical action, as it is used to permanently delete the role.
- A text field is provided containing the updated role name, New group edit.
- On the right side, a Save button is available, which the user must click to confirm and store the changes. This layout allows users to modify a role’s name and save the updated information within the system.


Assign Users
- The Assign Users function is used to link specific users to a particular group or role. In simple terms, it allows an administrator to decide which users should belong to the selected group, so they can receive the permissions, access levels, or restrictions defined for that group.
- After clicking the Assign Users button, the following elements become available.:
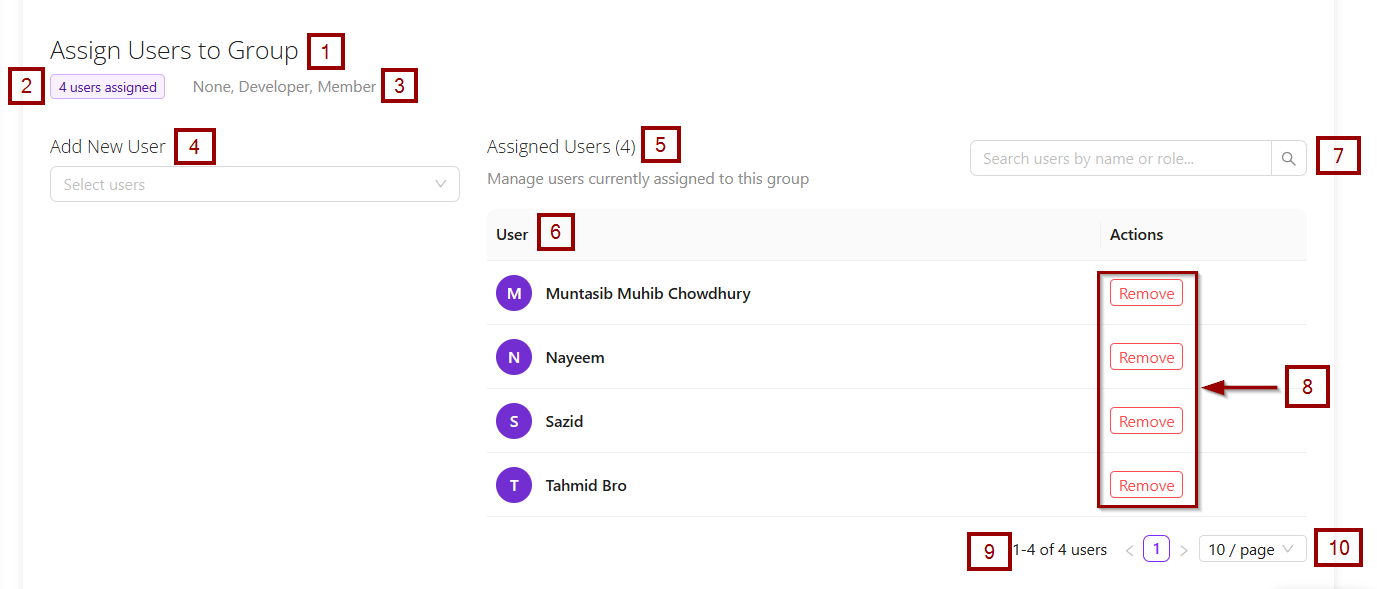
- Header and Summary:
- Assign Users to Group: This is the main title of the page.
- 4 users assigned: A summary stating that this specific group currently has 4 members.
- None, Developer, Member: These are likely filters or status indicators for the users, allowing an admin to view users with specific roles (e.g., Developer) or no role (None).
- Add New User Section: This is the control panel for adding more people to the group.
- Select users: This is a button or a dropdown menu that, when clicked, would open a list of all available users in the system to choose from and add to this group.
- Assigned Users Section: This is a list that displays all the users who are currently members of the group. It has several components:
- Manage users currently assigned to this group: A sub-heading explaining the purpose of this list.
- User List: A table or list showing the assigned users.
- Search Bar: An admin can use the search box, labeled Search users by name or role..., to filter the list and quickly locate a specific user.
- Actions: Each user has a Remove button next to their name. Clicking this would remove that specific user from the group.
- Pagination Info: The text 1-4 of 4 users and 10 / page indicates that all 4 users are shown on this first page, and the interface can display up to 10 users per page.
- Header and Summary:
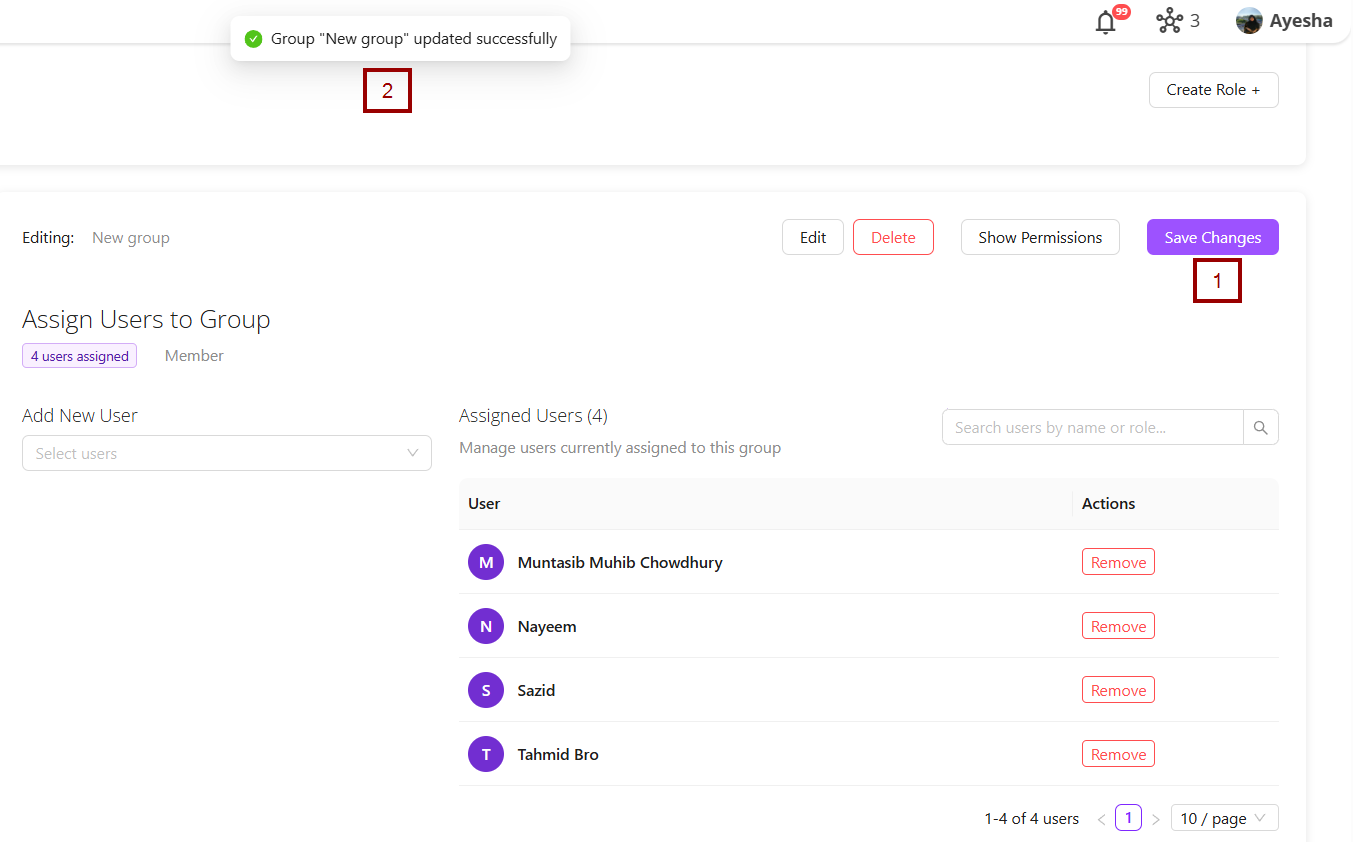
- After clicking the Save Changes button, the Group "New group" updated successfully message appears.

Show Permissions
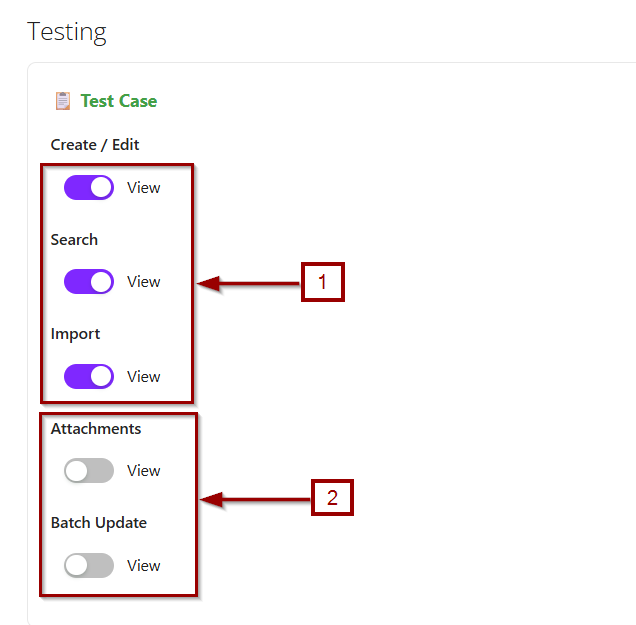
- The Show Permissions function displays the exact access rights granted to a selected group. It allows administrators to review which actions can be performed.
- After clicking the Show Permissions option, all features available under the Testing, Project and Admin for that specific group are displayed. Features that the group can access are indicated by a purple button, while features that are not accessible are shown with a grey button.

Grant All / Remove All
- Grant All: The Grant All function is used to give a group or user full access to all available features or permissions at once. Instead of enabling each permission individually, this option automatically selects all permissions, simplifying the process of assigning comprehensive access.
- Remove All: The Remove All function is used to revoke all permissions or access rights from a group or user at once. Instead of deselecting each permission individually, this option clears all assigned permissions, effectively removing access to all features.
FAQs / Troubleshooting
FAQs
What is a Group?
A Group is a collection of users that provides centralized access control. Users added to a Group automatically inherit all permissions assigned to that Group, which apply across all Team Projects they are associated with.
Can a user belong to multiple groups?
Yes, a user can be part of multiple groups, and permissions are combined.
What is the difference between Group and Role?
A role defines specific permissions, while a group is a collection of users to whom roles or permissions can be applied.
How do I assign users to a Group?
Use the Assign Users option, select users from the list, and save changes.
Troubleshooting
- Users not seeing expected permissions: Ensure the group has the correct permissions assigned and the user is added to the group.
- Unable to create a new group: Check if the logged-in user has admin-level access.
- Permission changes not applied: After modifying permissions, click Save Changes to apply updates.
- Group deletion fails: Ensure that no critical dependencies exist and that you have the necessary permissions to delete the group.
Changelog
- Create and manage user groups with custom permissions [20251015]
- Assign specific permissions for different platform modules [20251015]
- Control access to testing, project management, and administrative functions [20251015]
- Add users to groups with automatic permission inheritance [20251015]
- Users get combined permissions from ALL their groups - if ANY group has a permission, the user gets access [20251015]